Contents
What is a PCB Kit?
A PCB kit is simply a collection of resources. You will need the funds if you want to make your PCB. Will have the required tools, accessories, equipment and items to make PCBs.
What you put in the tool is up to your choice. That means your PCB kit may differ from the bag of another person. There's no reason to fret over this as it's normal. You rest your worries if you have the minimum tools to make your PCB. After that, it's up to you what you want to include in your kit.
You can either make your kit or purchase it from a store.

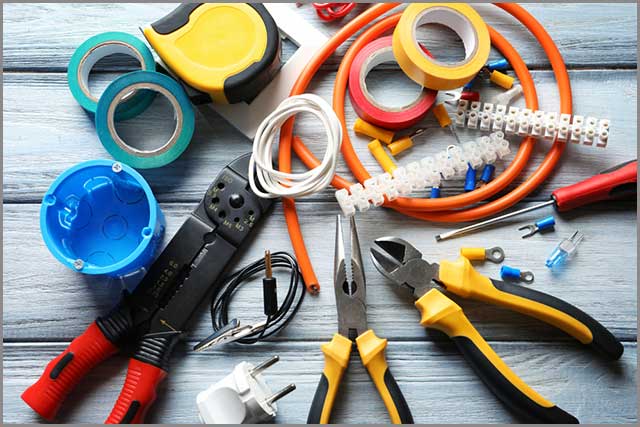
PCB Kit and tools for electronics assembly
Tools And Software For PCB Kit
There are some tools which you need to make a PCB. We will first take a look at those essential tools you need to have in your PCB kit.
Tools in PCB Kit
| PCB Kit Tool | Purpose |
|---|---|
| Mini Drill | For drilling holes to attach components and making vias to connect board layers. |
| Flat Iron | For ironing the PCB layout onto the board; ensure it has temperature control. |
| Printer | Use a laser printer or photocopying machine to print the PCB layout; avoid inkjet printers. |
| Saw | To remove excess portions of the PCB board. |
| Soldering Iron | For fixing components onto the PCB; keep some flux handy. |
| Latex Gloves | Provides protection and prevents injuries while working on the PCB. |
| Eye Protection | Goggles or other eye protection to prevent exposure to chemicals and toxic materials. |
PCB Kit Materials
For your PCB kit, gather the following materials:
You will need three types of Printing Paper for printing PCB layouts:
- Photo paper
- Glossy paper
- Magazine paper
- PCB Board: The base for your PCB. Choose based on your preference.
- Copper: Used for creating the PCB traces.
- Marker/Pen: A fine-tip permanent marker for manual markings on the PCB.
- Sandpaper: Useful for removing paper from the PCB and cleaning the board.
- Etching Solution: Ferric Chloride is recommended for etching.
- Plastic Container: To hold the etching solution; avoid metal containers.
- Ruler: Optional, for measurements and trace width determination.
- Plastic Tweezers: To handle the PCB during cleaning and washing; metal tweezers can rust.
- Cutter/Compass: Needed to remove excess paper.
- Soap and Brush: For washing the board post-etching to expose copper traces.
Special Offer: Get $100 off your order!
Email [email protected] to get started!
How to Build Your Own Circuit Board Kit
Building your own circuit board kit involves several steps, from designing the circuit to assembling and testing the final product. The process starts with selecting or creating a design using PCB design software. Once the design is finalized, you move on to assembling the components on the board according to the design specifications. Finally, you test the assembled PCB to ensure it functions correctly.
Step-by-Step Guide to Building a Circuit Board Kit
Step 1: Design Your Circuit
Start by designing your circuit using PCB software like Diptrace, Autodesk Eagle, or Altium Designer. This software helps you create a schematic of your circuit, showing how components connect and ensuring your design meets electrical standards. Focus on optimizing the layout to reduce interference and improve performance. Simulate the design to catch any issues before moving on.
Step 2: Gather Tools and Materials
After finalizing your design, gather all necessary tools and materials. Choose a suitable PCB type (single-sided, double-sided, or multi-layer) and collect components like resistors, capacitors, and ICs that match your design. Essential tools include a soldering iron, multimeter, tweezers, and a magnifying glass. Having everything ready will make assembly smoother and reduce errors.
Step 3: Prepare the PCB for Assembly
Prepare your PCB by transferring your design onto a copper-clad board if you're making it yourself, or inspect a pre-fabricated board for defects. Clean the board to remove any contaminants that could affect soldering. Proper preparation ensures components are securely and accurately placed on the board.
Step 4: Assemble the PCB
Place and solder each component onto the board following your design. Start with the smallest components and work up to the larger ones to keep your workspace organized. Ensure each solder joint is clean and secure, and trim any excess leads. Inspect all connections to confirm everything is in place.
Step 5: Test the Circuit
Finally, test your assembled PCB. Visually inspect it for any issues, and use a multimeter to check continuity and resistance. Power up the circuit and ensure it works according to your design. If problems arise, troubleshoot by checking solder joints, component values, and orientations. This step ensures your PCB is functional and reliable.
Tips for a Successful DIY PCB Kit Assembly
- Double-Check Your Design
- Before you begin assembly, verify that your PCB design is error-free. Look out for common issues like overlapping traces, insufficient clearances, or incorrect component placement.
- Optimize Your Workspace
- Ensure your work area is well-lit and organized. Good lighting reduces the chances of mistakes, particularly when working with small components. An organized space also helps you find tools and components quickly.
- Follow Safety Guidelines
- Always wear safety glasses and work in a ventilated area, especially when soldering. Be mindful of the heat generated by soldering irons and avoid touching hot components until they’ve cooled.
- Practice Patience
- Take your time with each step, particularly when soldering. Rushed soldering can lead to cold joints, shorts, or damaged components. Patience and precision are key to a successful build.
How to Maintain Your PCB Kit
You need to care for your PCB kit if you want it to last for a long time. So we thought of giving you some tips to facilitate maintenance of your equipment-
● Use a big box or container to store tools
● Always put back the tools in their respective places after use
● Clean tweezers and other material right after use
● Keep a soft cloth to clean kit items
● Store in a safe area without disturbances
● Replace any broken or malfunctioning tools at the earliest
 Image 3: PCB Kit
Precautions
Making a PCB kit is not a difficult task. But there are some precautions to take-
● Don't make the mistake of using cheap PCB tools and materials
● Always include safety gear like gloves and eye protection in your kit
● Don't use metal containers while etching
● Use plastic tweezers or tools if you don't want them to develop corrosion
● Store your PCK kit in a safe place
● Keep your PCB kit out of reach of children or pets
● Dispose of chemicals like etching solutions in a safe place
 Image 4: Tools
Get in Touch
Get in touch with us if you want a professional hand. We manufacture high-quality PCBs meeting your exact specifications. We are here for all your PCB-manufacturing needs.
Special Offer: Get $100 off your order!
Email [email protected] to get started!


