Developing a Bluetooth-enabled smart ‘appcessory’ (companion applications and accessory modules) is now easier. Thanks to the BLE Nano development board, you can produce demo boards for the Internet of things, including other interesting projects. As an electronic enthusiast, you will learn how BLE Nano can work with different electronic components.
Contents
- What is BLE Nano?
- Ble Nano Pinout
- Reset the Module to Its Default Settings
- Changing the BLE-Nano Bluetooth Name
- Bluetooth Control with a SmartPhone
- Modules Required
- The Wiring Diagram Table
- Installing Code to the BLE Nano
- Bluetooth Communication between Two Nano BLE Devices
- Acquire Slave Device Address
- Setup master
- Arduino Nano 33 BLE
- Summary
What is BLE Nano?
BLE Nano is an amalgamated blend of outdated Nano, featuring a CC2540 Bluetooth Low Energy (BLE) unit. Its core microprocessor is ATmega328P, which receives and sends Bluetooth packages from CC2540 chip communication over the serial port. In addition, the Bluetooth unit connects directly to the Arduino communication UART RX/TX pins (pins 0 and 1).
Ble Nano Pinout
Reset the Module to Its Default Settings
Before you begin to work with this module, you must reboot it back to its default position. Using the Serial Monitor, send the module an AT command.
Begin by creating a blank draft by going to File->New and name it “blank.”
Setup the Port, Workstation, and the correct Board details(they may have different numbers). Afterward, link the BLE-Nano to your PC's USB port.
Then, upload the blank draft, ensuring you use the “ATmega328P” processor and not the “old bootloader.”
Set up the Serial Monitor. Note that the rapidity should be at a constant speed of 9600 bandwidth.
On the top, go to the text field and type AT-Commands. Write the initials “AT” and press enter.
To ensure that the commands work, you will get an “+OK.”
To acknowledge the command is successful, you will receive a +Success. Finally, on the gadget, click the reset key and close the Serial Monitor to ensure the setups fit into effect.
Special Offer: Get $200 off your order!
Email [email protected] to get started!
Changing the BLE-Nano Bluetooth Name
When you want to use BLE-Nano in a surrounding with many individuals, you may not get BLE-Nano among the many electronic devices for connection. With the following commands, you will be able to differentiate your module by setting different names.
Electronic signal processing devices in sockets
Begin by uploading the blank draft just as we did when resetting the module to the default factory setting. Nevertheless, in this case, change the name to NEWNAME.
Once receive a +SUCCESS reply for a successful command, restart the BLE-Nano by removing the USB power source cable.
Bluetooth Control with a SmartPhone
We will use an amalgam between the CC2540 BLE Bluetooth chip for the BLE Nano and Arduino Nano with ATmega328P as the core microchip. Furthermore, it sends and accepts Bluetooth packages through serial communication via the hardware serial ports within the CC2540 BLE chip.
In addition, to regulate BLE-Nano, we will use the BLExAR iOS app using an iPhone, and to enhance and blurry the RGB LED, we will use the ATmega328P PWM competencies. 
Bluetooth Control with a SmartPhone
Modules Required
- BLExAR app
- Small Breadboard
- RGB LED
- BLE Nano
- Jumper Wires
The Wiring Diagram Table
| BLE Nano | RGB LED |
| D2 | R |
| D3 | G |
| D4 | B |
| GND | - |
You can use the Arduino Nano sense board in place of BLE Nano with a few serial port adjustments as part of D0/D1. Furthermore, you can wire RGB LED, including any motor, signal, or wearable device, to A0 – A7 or D2 – D13 pins.
Installing Code to the BLE Nano
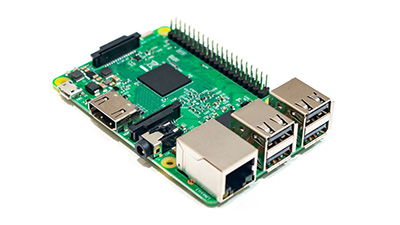
Before any control code installation to the BLE Nano, ensure you plug it first through the PC micro-USB interface connector port. In our case, we will use Raspberry Pi. It’s essential to confirm it uses the appropriate Arduino board LED, including the relevant software framework. Hence, follow the procedures carefully.
Choosing the Arduino Nano Board
Choosing the mainframe with the ATmega328P
If the code upload sends within the RGB LED pins correctly, it will switch them on and off and pin them. Meaning the BLE Nano is working fine. Nevertheless, if it’s not working, inspect the cabling to certify the standard components are accurate.
You now require BLE Nano to act as a normal Arduino Nano board. Besides, switch RGB LEDs at intervals by looking at the cabled pins. In addition, the BLE Nano lets the sense board voltage regulator modify LEDs' intensity and is proficient in PWM. Besides, it handles I2C module connections and reads digital/analog input pins.
Bluetooth Communication between Two Nano BLE Devices
When it comes to Bluetooth interaction decorum, the master commences the serial communication. Besides, it can link even seven slaves. After linking, the slave and master communicate with no hindrances.
The BLE Nano Bluetooth host device interchanges interaction through the Arduino Serial interface. As a result, it provides one major benefit; no pins are lacking for the Bluetooth unit. Nevertheless, its major drawback is that short-distance wireless communication protocol sometimes obstructs consistent interaction. For instance, there may be interference when interacting or installing through the Serial Monitor.
Here are major points to note;
- If the draft processing the serial data is streaming, you can’t conduct AT-Commands through the Serial Monitor. If inevitable, send AT-Commands in advance and then install a blank draft.
- Several AT-commands alter the Arduino software stack, instigating the serial monitor to withhold additional response to AT-commands. If that happens, restart the Serial Monitor.
- The module doesn’t accept AT-Commands once the Bluetooth smart link is functional. Besides, it doesn’t upload new drafts.
- Once you establish the Bluetooth linking, its status will be on and blink once if not connected.

Various colored cables with various connectors suitable for different ports
Acquire Slave Device Address
You don't need to do any configuration because BLE Nano is a slave by default. Nevertheless, connecting it will require you to have the device's address.
Setup master
To evade master mix-up, amalgamate the slave to the standard voltage power consumption source and not the PC. Likewise, link the master to your powerful processor USB port. Issuing AT-Commands will require you to restart the Serial Monitor.
Besides, completing the scan should bring back all the nearby addresses of Bluetooth-connected devices. In addition, it will also bring the slave. In the Arduino, you will see the Bluetooth status led is on and a message showing “Connected.”
Arduino Nano 33 BLE
Featuring a 9-axis inertial measurement unit and Bluetooth connectivity, Arduino Nano 33 BLE is a Nano-sized board that augments the scope to the typical accelerometer and gyroscope. It's easy to confuse the board with Arduino Nano 33 BLE Sense. Nevertheless, Arduino Nano BLE doesn’t have extra gesture sensors, which the sense version features. These additional onboard sensors include color sensor and light sensors, accelerometer/gyroscope, air pressure sensors, barometer sensor, and temperature sensor. Besides, the Bluetooth module from uBlox runs the Arduino Nano BLE featuring a 32-bit ARM Cortex-M4F arm processor. Its connectivity is versatile; therefore, you can use it as a USB host or USB device. In addition, it can be a Bluetooth host and Bluetooth peripheral device. As a result, it makes it an excellent compatible board ideal for creating a human interface and wearable gadget.
Summary
For DIY digital fanatics and hobbyists, BLE Nano is an excellent innovation when in need of IoT technologies and linked modules. Besides, it operates between 1.8V to 3.3V, making it work with various electrical modules. Using this Bluetooth-enabled Arduino board version, the opportunities are vast and possibilities endless.
Special Offer: Get $200 off your order!
Email [email protected] to get started!


